Saturday, June 24, 2006

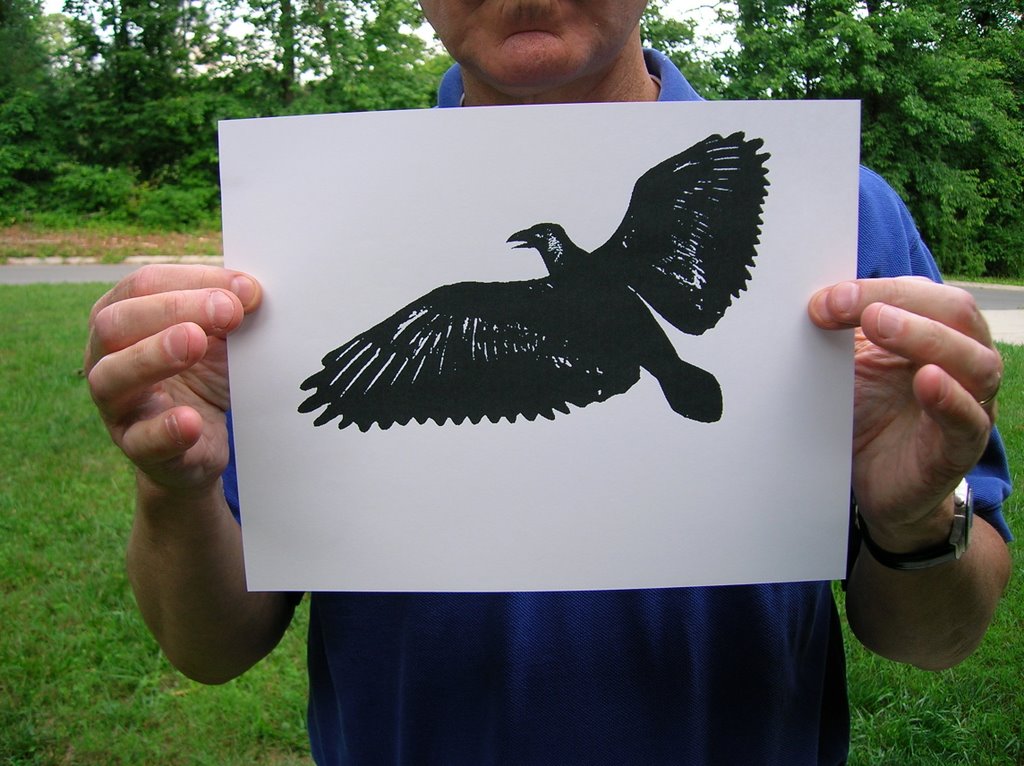
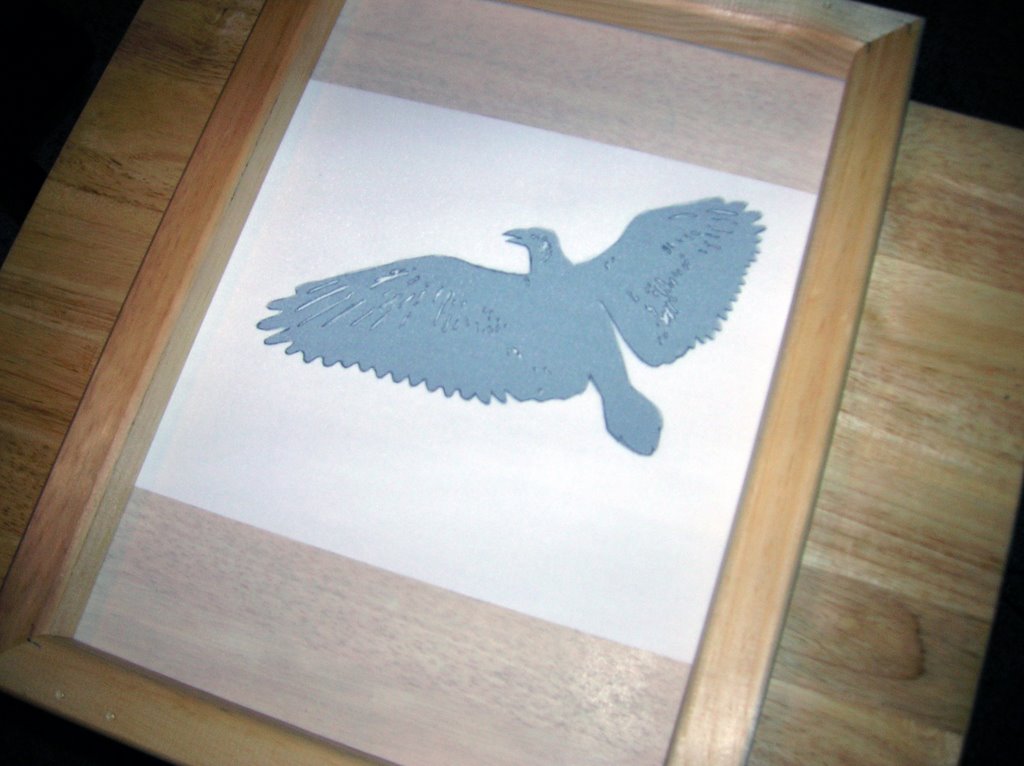
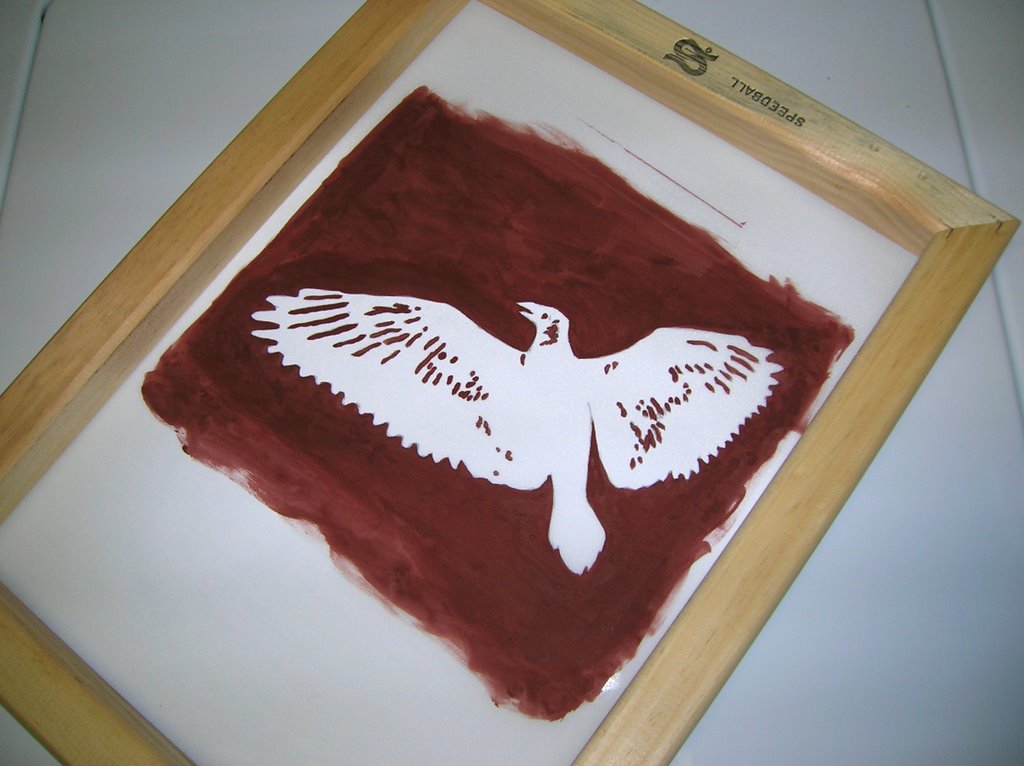
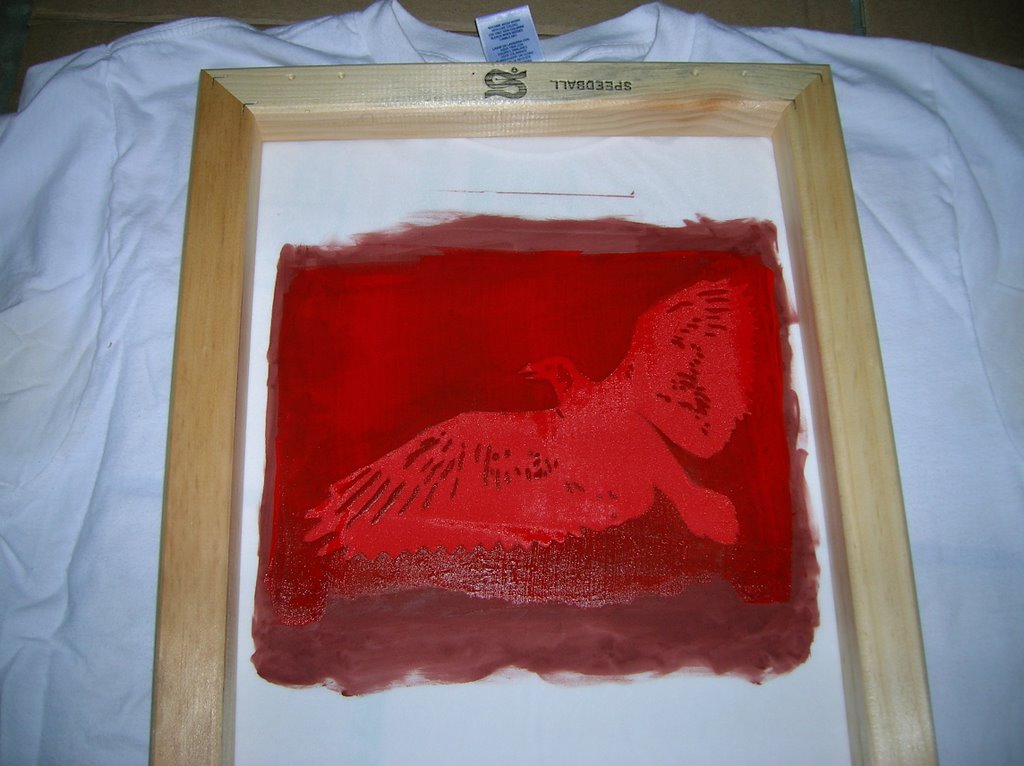
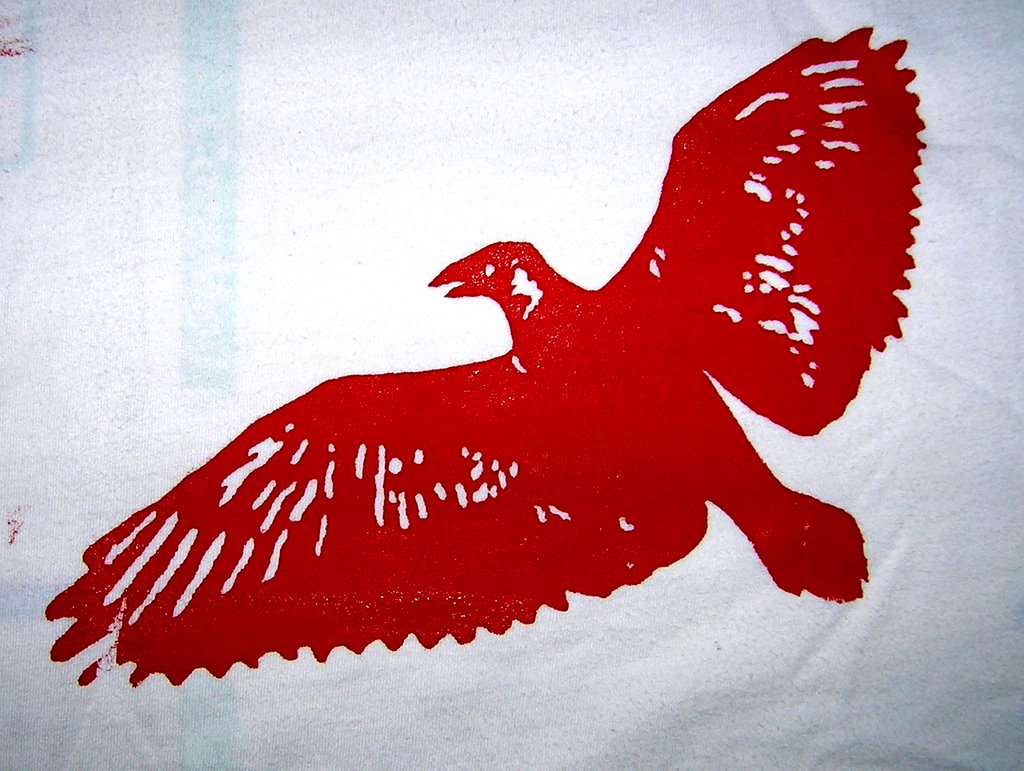
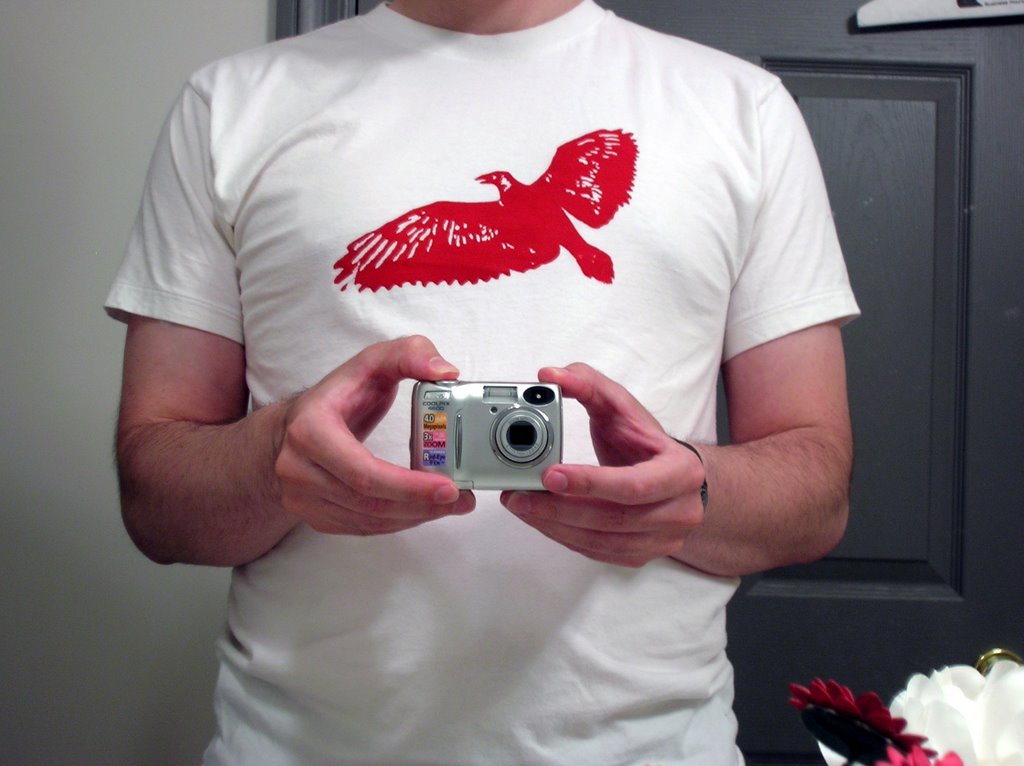
The Screen Filler Method

There are basically three commonly used methods of screen printing: Drawing Fluid Method, the Screen Filler Method, and a more complex process using Photo-emulsion stencil. The step-by-step screen printing process deomonstrated below is called the Screen Filler Method. Any of the mentioned methods can be used to print one or more color prints on a variety of materials. For my demonstration I am using one color for the sake of simplicity. These steps may be repeated for use of multiple colors. There are a few materials that you will want to have on hand for this printing process:

1. Screen Filler Solution (I am using Speedball brand)
2.
a cheapo brush and a pencil
3. Screen Frame (Polyester mesh works well)
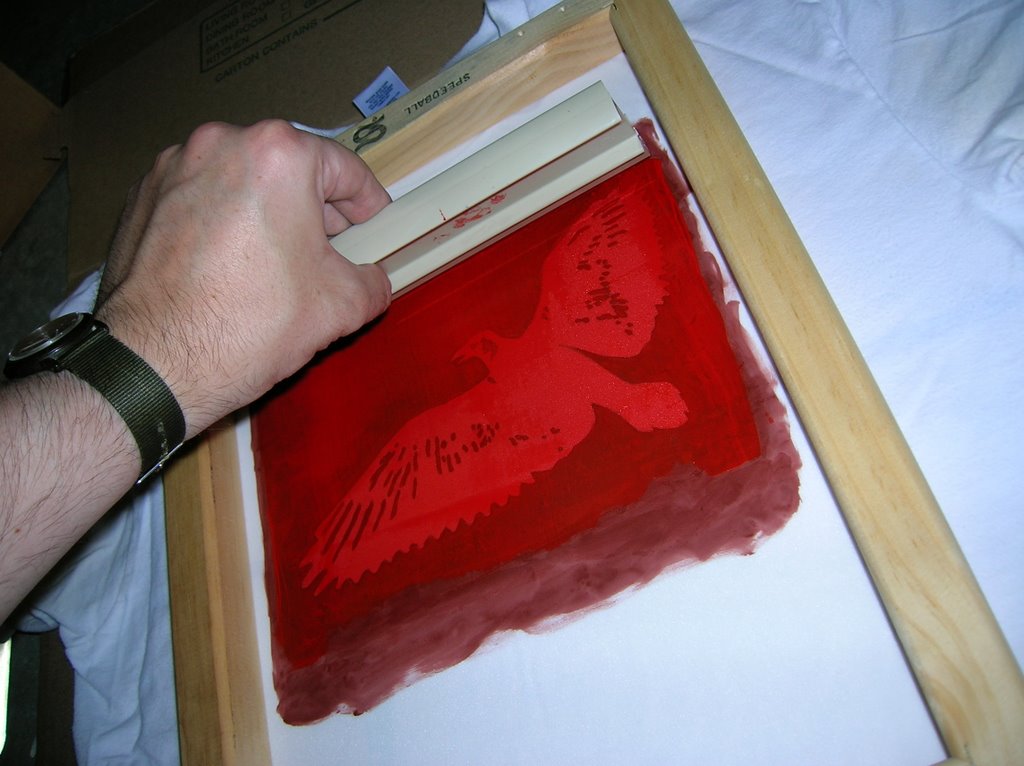
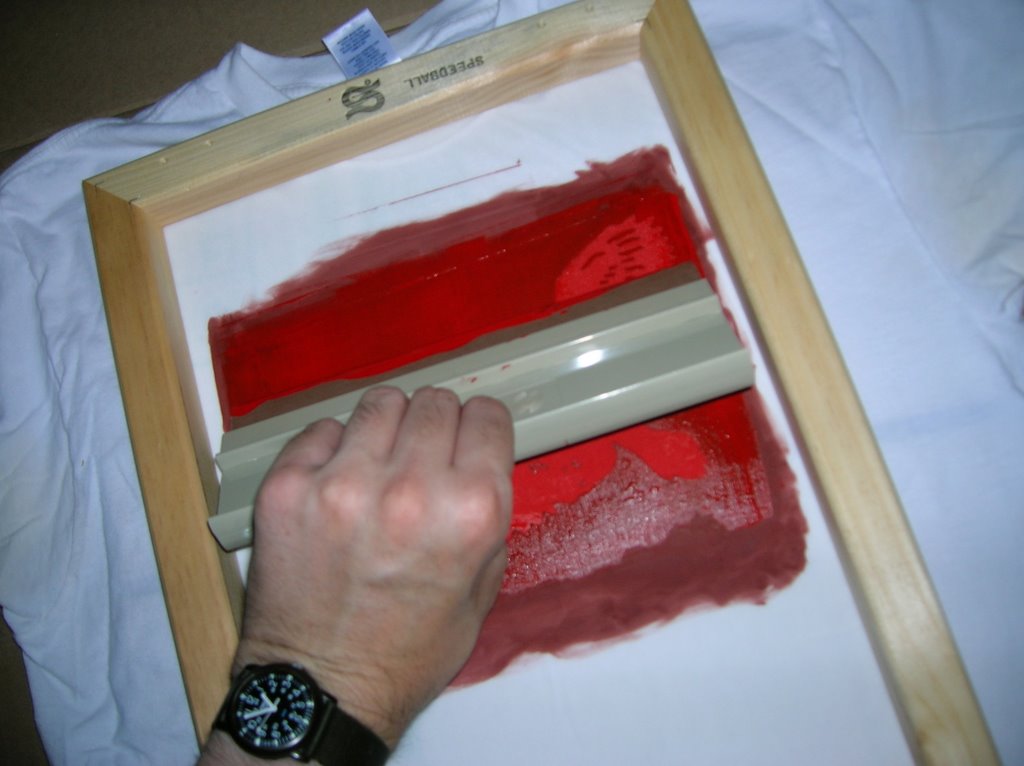
4.
Screen Printing Ink (again, Speedball works well and makes a type specifically for fabrics)
5.
A Squeegee or flat piece of plastic for smoothing ink
6.
A liberal number of paper towels or rags
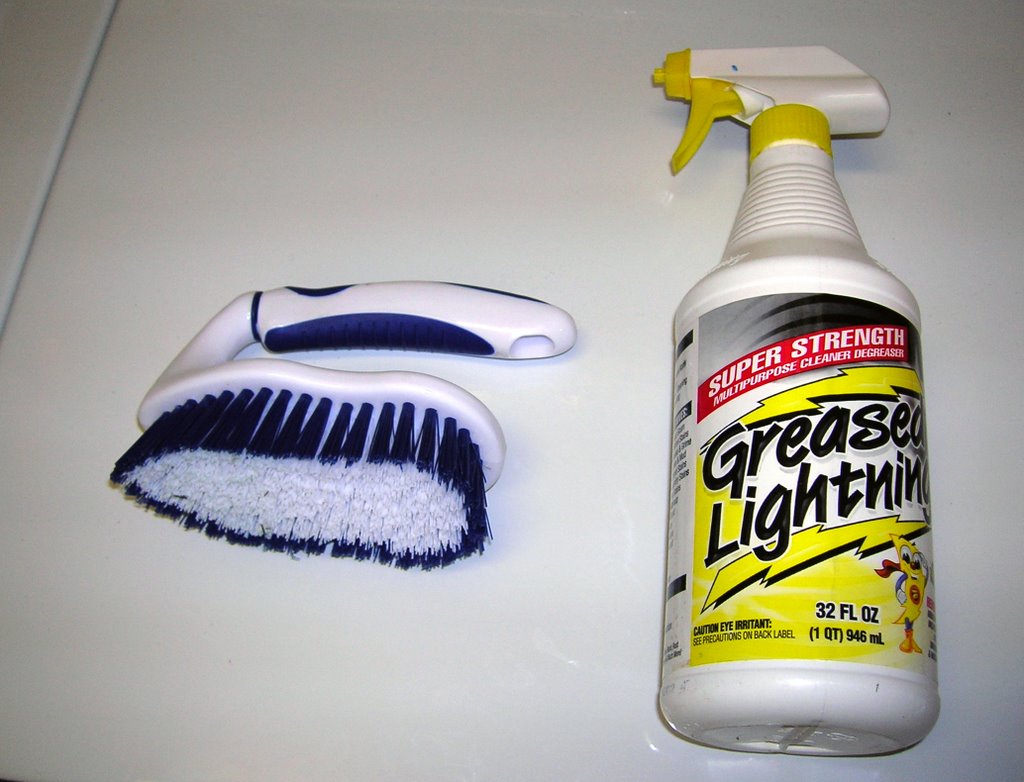
7.
Greased Lightning (it's a cleaning product not an alcoholic drink) or Comet. You will also need a Scrub brush. It will take a few good minutes of scrubing to clean off the embedded Screen Filler when you are finished.


8. Access to a water hose with a forceful spray will also be of help when you decide to clean the ink and Screen Filler. Screen Printing ink drys FAST so it is a good idea to clean up immediately after printing.


Friday, June 23, 2006


The first thing you need to do when working with screen printing is to select an image. I am going to work with this digital image of a bird because it is simple and bold. Begin to consider the material that you will be printing on whether that is a T-shirt or canvas or paper. Also think about what ink color or colors will work for you. Remember you may also start with a drawing or a photograph rather than a digital file. Working with an original drawing will only slightly change the process I am going to describe but it is essentially the same. I will try to make note of what those differences in process will be.

For this method of screen printing (known as the screen filler method) it is best to work with images or drawings that are broken into only positive and negative space. This means that if you have any gradients of gray value they need to be eliminated. You will see why when we get to the tracing stage.

I have broken my bird image into positive and negative space by using a Photoshop tool known as Threshold. This can be found under the top menu bar under the tab "image". Once you have selected "image" scroll down to "Adjust". Under "Adjust" you should see "Threshold" near the bottom of the list. When you select "Threshold" a window will pop up that allows you to adjust the contrast threshold of your image. Of course you do not need to use the computer at all for screenprinting if it does not suit your working process. You can also break up this postive and negative during the drawing or tracing process.


You will need a physical image to begin working on your screen print. In my case that means a computer print of my Photoshop file. I am only using my digital print out as an image to trace so it is not important that it is high quality. Of course you do not have to start with a digital print out. A drawing, a photocopy, or a high contrast photograph will do the trick as well. The important thing to keep in mind is that your image should be easy to trace and divide into positive and negative space.


Once you have your image ready to go the next step is to transfer a tracing onto your screen print frame. Lay the bottom of the frame directly on top of the image so that it is touching the mesh screen. Because your image is broken down into postive and negative space all you have to do is follow your outlines with your pencil. Remember to trace any interior lines in your image as well. I am going to use the light pencil lines as guide markers for painting in my screen filler.


My image is traced and ready for screen filler.


The next step is to paint screen filler around your drawing (any paint brush should work). The screen filler will prevent ink from penetrating the polyester screen so essentially you are creating a stencil. It is obviously important that you figure out your positive and negative space before you start painting the filler. The screen filler has a red hue to it and has the consistency of acrylic paint. The filler will take a little while to dry so set it aside for an hour or so. If the screen feels dry when you touch it then it should be fine. Hold the screen up to the light to check for pin holes that ink might escape through. If you find any then simply spot check those areas with a little extra screen filler. Now you are ready to print.

Thursday, June 22, 2006


Run the squeegee from top to bottom of the screen. Apply the ink liberally in multiple passes. Try to avoid hitting outside of the masked screen filler area. If it helps, have someone else hold the frame down while you run ink passes.


Keep the squeegee angled at 45 degrees.


Run the Squeegee over the screen a few times until all of the image area appears to be covered. Make sure that you have good coverage because once the screen is lifted you will not be able to reposition it.

Wednesday, June 21, 2006


After you have lifted your screen frame, allow the fabric to dry for a couple of hours. It is also recommended that you place a piece of paper on your shirt and run an iron over the print area. This should help seal in the ink. Be sure to place a blank sheet over paper between the iron and the ink so your design will not melt.


Show off your work.